 English
- Home
- About Us
- Tours
- A Great Day Out [1D]
- Eastern Seaboard Tour [2D]
- Paradise Island Tour [3D/2N]
- The Eastern Thailand Isan Adventure Tour [6D/6N]
- Paradise Island Tour [7D/6N]
- THE MEKONG RIVER TOUR [7D/7N]
- West Thailand Kanchanaburi Experience [9D/8N]
- The Sensational Southern Thailand Tour [10D/10N]
- Golden Triangle Grand Tour [15D/14N]
- separator
- ENDURO TOURS (BY ENDURO MADNESS)
- Rentals
- Information
- Gallery
- News
- Contact Us
QUESTIONS? CALL:
+66 087-740-7979
Motorcycle tours and big bike rentals in Pattaya, Thailand.
22/6 Moo 6, Pong, Banglamung,
Chon Buri 20150
Tel: +66 087-740-7979
info@motorbike-madness.com
ADV MAINTAINANCE, 10 TOP FIXES
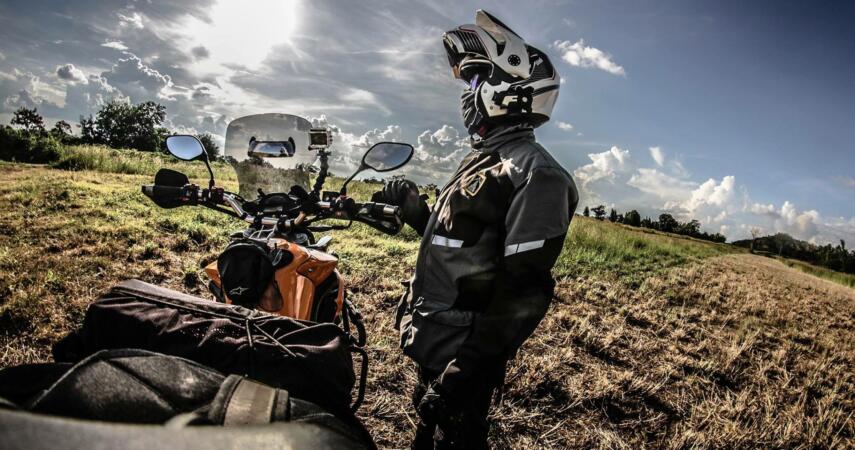
The aim of this blog is to give the reader an insight into some of the essential mechanical skills needed for the preventative maintenance of ADVs. Here we list the top 10 fixes that are most commonly needed. we’ll show you how to properly maintain your vehicle at all times even if you’re out on the trails.
1. FACTORY SPEC, VEHICLE MANUAL
As soon as you purchase your ADV go through the owner’s manual, this will not only give you hints and tips on how to fix problems but how to use your vehicle right in the first place. If you don’t have one, look online and there will more than likely be one there. It’s surprising just how much damage prevention can be achieved by this simple but important task.
The owner’s manual will show where fixable units and components are located, such as fuses and relays. valuable information on torque settings and disassembly instructions will ensure that you do it right.
Following the manual will make sure that your maintenance is completed the right way. missing screws and wrongly set specs can be avoided by making your vehicle run and perform the way it was intended.
2 BLOWOUT, TYRE MAINTENANCE
It might sound like a no-brainer but it is surprising just how many people head out off-road without the necessary equipment to fix and a flat tire, or knowing if the tire itself has an innertube or is tubeless.
If your bike has a centre shand tire removal will be a much easier process, if it doesn’t then use the side stand and the power of leverage is the go. tilting the bike to one side and balancing it against a tree does the job. In the case of tubed tires, you’ll require tire levers, one should always carry them when on the road. As an alternative, the vehicle’s side stand can be used instead. Insert the iron into the sidewall of the tire and lever outward until a popping sound is heard. This is the glue detaching itself from the wheel rim.
Once you’ve got the tire off the rim check both the tire and tube for any foreign debris which might still be there. You may well need a pair of pliers to get it out so add this tool to your bag. Be careful when feeling around for sharp objects. Gloves are always a good idea.
Replace the inner tube with a new one if you have one, if not you will have to glue a pad on the punctured tube. We recommend the former solution. When replacing the tire be careful not to pinch the innertube with the irons, this could cause another puncture.
Pumping up the tired will require a hefty pump to adequately fill the required pressure. We recommend a CO2 cartridge as a better and lighter option.
The tubeless tire process is an easier fix. For this you will need a tubeless tire repair kit, these are very easy and cheap to buy. Once you’ve found the offending object remove it and clean the area. Use the self-binding rubber insert to plug the hole and pump up the tire. Check the hole is plugged properly by using water. If there’s still a leak bubbles will form.
3 WORN OR DEPLETED BATTERIES
In the case of a flat battery thankfully there are a number of solutions to this problem. The first is to kick-start your bike. This, of course, is proving you have one, if you only have an electric start then you’re out of luck here. You may have to kick many times before the bike will start. if this has no effect then bumping the bike may solve the problem. Find a hill if you can and click into second or third gear, this will reduce the torque to the engine and make life easier. roll the bike with your hand on the clutch and release when you have momentum. The bike should fire up and you’re on your way again.
If the first two options have no effect then your only option is to use jump leads or carry an extra battery or battery pack. Jump leads will require another vehicle to jump from of course. Instructions on how to use jump leads will come with the leads themselves. Bike jump leads are smaller and easier to carry.
4 ELECTRICAL PROBLEMS
The two simplest culprits for electrical faults are loose connections the battery and failed fuses, so knowing where the battery and fuse box is and having the correct tools to get to them is vital. Before going out in the wild make sure you have them and a spare set of fuses. First of all, check the battery connections to see if they are tight and undamaged. Tightening the leads may solve the problem but if it doesn’t then check the fuses. Remove and check for broken bridges. Look closely at the metal inside the fuse casing, if it is burnt and or broken that’s most likely the problem. Replace and you’re on your way.
5 DUCT TAPE AND CABLE TIES.
There are a million and one uses for these absolute gems, they should be considered as must-have tools for all riders. Things break all the time and they can’t always be fixed back to perfection right at once so having duct tape and cable tired are a quick and adequate fix. Broken or flapping panels and loose dangling wires are potential disasters waiting to happen. Prevent these problems from forming by securing them tightly.
Firstly and most obvious is to carry spare gas with you. Make sure the bottle is approved for gas. Water bottles are incredibly dangerous. Don’t take that risk. Another option is siphoning fuel from another vehicle. you’ll need a plastic hose, and an auto siphoner is recommended, again very cheap and easy to purchase. Just make sure that whatever you’re siphoning into is lower than the source. As a last resort suck the gas through the pipe with your mouth, use a clear pipe so you can see the gas coming then pinch the pipe before it gets in your mouth, you don’t want that.
7 DAMAGED BRAKE – CLUTCH LEVERS, GEAR PEGS
If you’re really into off-road you might want to cut down your clutch and front brake levers. This is limit the chance of breaking them. If they do become damaged or broken here are a few quick-fix options using your good old duct tape and cable ties. (i told you). You can make a substitute lever by attaching anything you can find around you, such as a piece of wood branch, bamboo, metal pipe. The cable tie and duct tape to your lever – if there is enough to do that – to get you going again. If there is nothing to attach to then you can ride without the use of the clutch. We recommend watching youtube for an appropriate instructional video.
Vice or monkey grips are an option for rear brake and gear lever. clamping these down might do the job. Just make sure you ride carefully until you can replace the parts properly.
8 BROKEN OR CRACKED ENGINE CASINGS
If your bike is leaking oil it could be a crack in the oil pan, engine casing or leaking gasket. You need to stop riding immediately if you’re leaking oil, serious damage will occur to the engine if you don’t. JB weld is an intermediate fix. The area of the damage will have to be clean, preferably with white spirits or alcohol. The epoxy will need several hours to cure riding again, give it time. For bigger holes, one could use a piece of metal or even a coin to make up the gap. Remember this is the last resort and has a high probability of failure.
9 CHAIN REPAIR KIT
This comprises of links, breaker, and riveter. You will need to know what type of chain you have. if it has a master link or a clip type. Buy the correct kit for your chain and make sure you carry a spare master link. Choose a youtube video on the subject for instructions.
10 LOOSE OR BROKEN WHEEL SPOKES.
Sounds serious but the problem of a broken spoke is relatively easy to fix. Once again it’s the good old duct tape and cable ties to the rescue. Just secure the spoke and tape it in place. Not perfect but it will get you home.
Braking down the middle of nowhere is part of motorbiking. For most, it adds to the thrill and enjoyment. Where would we be without these stories to tell the kids? Following the steps above will give you a good chance of getting home in a sticky situation. Get yourself a maintenance bag and fill it with these essential tools and you’ll be back on the road in no time.
Tagged under:


